How To Apply Streak Free Fake Tan
A DIY fake tan is as synonymous with summer as sea, sand and sandals. And thanks to foolproof bronzing formulas, it’s never been easier to achieve a streak-free 'I’ve-just-been-to Tahiti' tan.

Once your hair removal, exfoliation and moisturisation is done, here’s what you need to do next when applying fake tan.
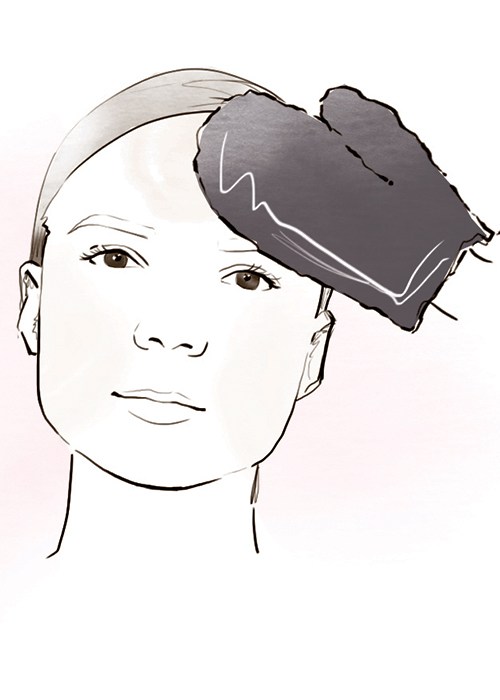
1 - Face
Apply tanner to your mitt and “start at the forehead with circular motions, before moving around the entire face”, explains Tayla Brandt, St. Tropez celebrity tanner,
who favours mousse formulaswith a mitt for ease of application. Once the mitt starts to dry out, rub it firmly over your ears to give them coverage.
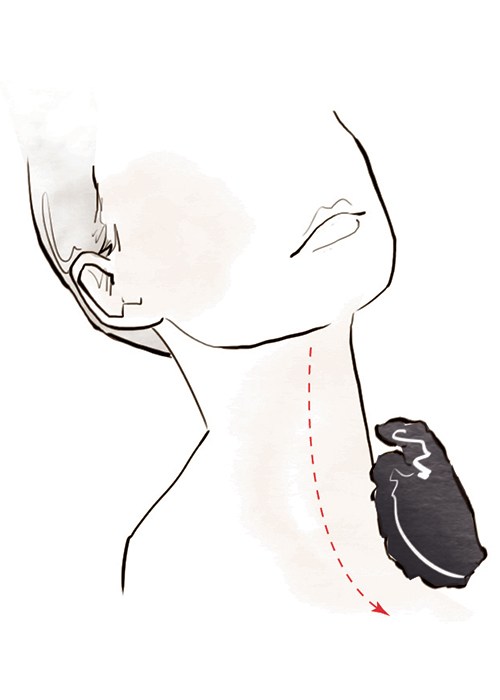
2 - Neck
“Look up and sweep your mitt in one direction, from the chin to the chest, repeating until the neck is covered,” advises Brandt.
3 - Décolletage & torso
“Continuing downwards, begin using circular motions and follow through to the hipbone,” instructs Brandt. “Start coming down the sides using the same action.”
4 - Back
Now for the acrobatics: use the mitt to cover the back (or as much as you can) in circular motions.
5 - Legs & feet
This is where you’ll use the most fake tanner, so ensure the mitt remains saturated. “Starting at the ankle and using circular motions, work your way inwards, gradually coming up the leg,” says Brandt. Repeat your preferred method of hand application on your feet.
| Luxurious | Self-Tan |

|
 |
| St. Tropez Classic Kit | St. Tropez Express Kit |
| BUY HERE | BUY HERE |
HOW : To Apply Streak Free Fake Tan With St.Tropez Guru
TOP TIP : When you’re done, avoid touching skin for at least five minutes and then slip into loose clothing (sans bra).